
Need Purim costume ideas for your little ones? We’ve got some good ones
 One of Judaism’s most festive holidays is coming up! Looking for new, simple and affordable ways to help your kids be a King, Queen or Villain? We’ve scooped up a few ideas for how to add a new twist to dressing up as some of your favorite Purim characters!
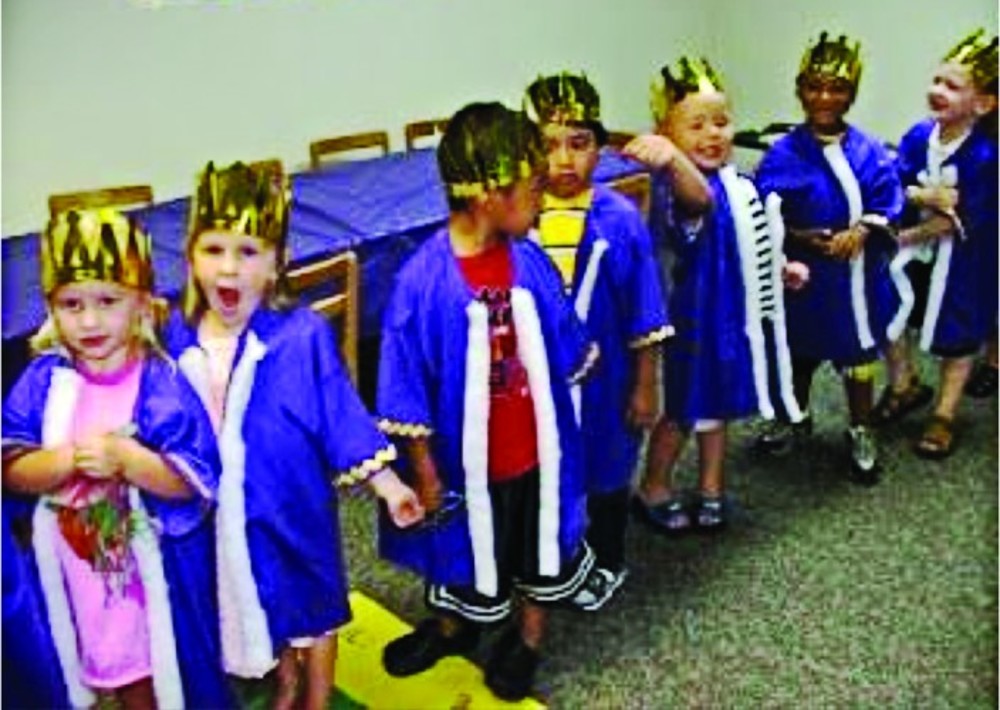
KING FOR A DAY
What you’ll need:
An oversized purple T-shirt
Quilt batting
Decorative gold ribbon
Glue
Scissors
Cut a line down the front of a big purple T-shirt, and sew on some quilt batting to the cut edges. Glue on some gold and majestic trim to the edge of the sleeves. Who said it wasn’t easy to become king?
A SKIRT FIT FOR A QUEEN
What you’ll need:
10 yards (maybe a little less) of fabric of your choice
Piece of ribbon for waistband
Scissors
While Ashley recommends 10 yards of fabric, feel free to buy a little less for your little one.
Fold the fabric in half length-wise and roll it up (it should look like a tube of wrapping paper.)
Cut into 5-6 inch sections – these should look like bathroom tissue rolls.
Fold these strips in half and tie to a piece of ribbon. Tie around your waist, and there you have it: an elegant skirt!
Throw on a favorite T-shirt, some similarly colored leggings and a crown for a full Esther costume.
HOMEMADE
HAMAN HAT
What you’ll need:
Two pieces of black construction paper
Scissors
Stapler
Haman’s trademark triangular hat can be made in less than 10 minutes!
Fold both the pieces of paper into thirds, like a letter.
Cut the first piece along the folds, and round off the rectangles a little bit.
Staple together to form a standup triangle.
Next comes the headband, which will go inside the triangle.
Cut the second piece of paper along the folds, and staple together to make a headband.
Staple the circular headband to the inside of the triangle, and place upon your or your child’s head.
Pair with some dark clothing, and you have yourself a villain!
For some old-fashioned flair, tie a colored rope cord around the waist/hip area.
TWO-TONED
FELT CROWN
What you’ll need:
Two pieces of felt,
colors of your choice
Double-sided adhesive
Needle & thread
Optional: ribbon
Optional: small plastic gems
Scissors
The following instructions are a bit of a deviation from Jenny’s original steps in the hope of making it easier, but the idea is generally the same!
Cut both the felt and the adhesive strips into 3.5-inch strips. You should have four felt strips and two adhesive strips.
With all four pieces of felt and the two strips of adhesive, sandwich two pieces of felt with an adhesive strip in the middle. Sew the two pieces together.
Cut out your crown – simple zigzag will work perfectly! Sew the other two ends of the crown together (or, for an extra bit of color, you can use the ribbon here around the base of the crown and tie it at the back to secure it.)
If you have gems, place them onto the base of the crown in whatever pattern you like using some leftover adhesive or glue.
Voila, a crown fit for a king or a queen!
Happy Purim!
KING: Photo and idea courtesy of http://bibleschoolteachers.blogspot.com/
QUEEN SKIRT: Photo and idea courtesy of http://ashleylivingeasy.blogspot.com/2012/12/tulle-skirt.html
HAMAN HAT: Photo and idea courtesy of http://biblebeltbalabusta.com/2013/02/16/easy-haman-hat/
CROWN: Photo and idea courtesy of Jenny from http://www.hellobee.com/2012/05/30/diy-felt-crown/


published by