
10 tips for creating a wedding website


As we find ourselves smack dab in the middle of the digital age, more things have crossed into the internet space. For weddings, invitations can only hold so much information and with the rising cost of paper and postage, many engaged couples have joined the trend of creating “wedsites” (or wedding websites).
It may seem like a daunting task to create a customized website, but with the help of many apps and page builders, the task has gotten a lot easier. Bride-to-be and Waltham, Mass., Native Leena Kent said building her “wedsite” has proven to be easy and convenient.
“TheKnot.com is free and easy: it’s extremely user-friendly,” Kent said. “It provides much needed and readily-available resources like a ‘budgeter,’ vendor contacts (and vendor ratings), a checklist of things to do down to the day, and an RSVP and guest list tracker. Not to mention a countdown to the day! If I ever need help, the app provides a chat room with a Knot representative to help with any wedding planning questions.”
For those new to website design and creation, here are 10 tips to help you get started.
1. Create a simple URL
There are many website builders out there, but most will allow you to pay extra for a personalized URL. Keep in mind your wedding website address needs to be shareable – keep it memorable and simple. If you’re sending out printed invitations, customized URLs make a big difference.
2. Focus on content
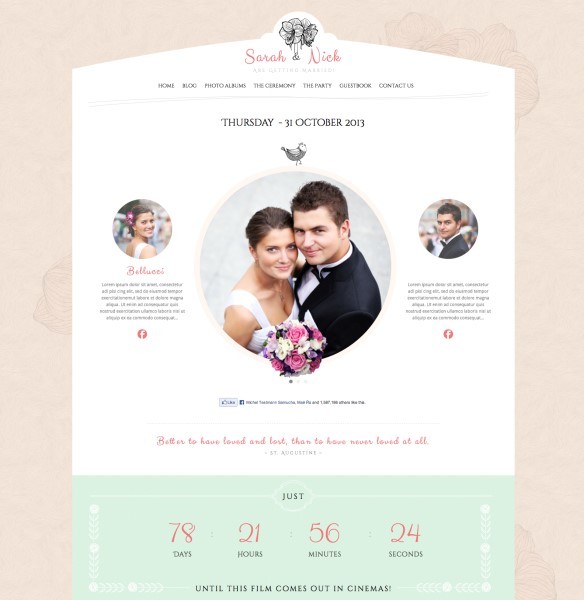
Content is the focal point of any website. Guests are ultimately visiting your wedding website to learn about your wedding and you as a couple. Start off by thanking your guests for being part of your special day. Then provide all the details of your wedding: dates, venue information, registries, dress code, etc. Finally, add a personal touch by telling your love story – how you met, how you got engaged, your first date story, favorite memories together and more. Also, include information on what you plan to do after you’re married – where you plan to settle down, if you plan to buy a new home together, honeymoon plans, etc. – this helps guests figure out appropriate gifts.
3. Be a resource for your guests
Approach your content in your guests’ shoes and act as their concierge. While your wedding may be local, some guests may be visiting from out of town or may want recommendations on what to do before and after the wedding. Provide ideas for accommodations, things to do and places to eat, but keep in mind your wedding site is not meant to be Expedia or
TripAdvisor. Limit your options by adding personal elements, such as the restaurant you had your first date, to help your guest immerse themselves in your love story.
4. Get creative
While website builders such as The Knot and Wix offer a multitude of wedding templates, feel free to add creative elements to your website. Hire a designer, a friend, or use Squarespace’s simple logo creator (logo.squarespace.com) to create a simple wedding logo. Add engagement photos, fun colors, or experiment with different templates for a memorable online experience.
5. Remember, less is more
Don’t go overboard. Current website design trends favor a minimalist side. Features such as background music, funky cursors and animated page transitions can increase load time, causing your guests to immediately regret visiting your website.
6. Share it early
Ideally, you’d like to have your website ready when save-the-dates go out and at least six months before the big day. This allows guests to plan accordingly and helps your planning remain efficient.
7. Allow access after the wedding
Many wedding website packages can allow access for one year or longer. While it may seem as though you’d only need it before the wedding, after is also useful. This allows guests to share their photos from the wedding, as well as view any wedding photos that have been uploaded. They can relive the magic, while also having access to any registries (etiquette suggests guests have up to one year to send wedding gifts).
8. Add your wedding hashtag
Social media hashtags for weddings are a big trend right now, so why not share the hashtag feed? Adding a widget or live-feed of any tweets or Instagram posts can help boost activity and engagement. Finding a hashtag URL is simple: type in the hashtag you’re searching for and copy the URL.
9. Don’t forget that contact info
Technology fails us at times, so it’s important to share your contact information for guests experiencing page load problems or those who are technologically-challenged. If you’re uncomfortable with putting your personal contact information on a public website, create a free wedding email – just remember to check it!
10. Explore your options
While The Knot may have worked for one couple you know, it doesn’t guarantee it’s the best option for you. Test out other website builders and be sure to find the one that’s provides the capabilities you need. Building a wedding website doesn’t have to be very technical or take very long, so choose wisely.
STEPHANIE ROSS is a freelance writer and public relations professional in Boston.


published by